News
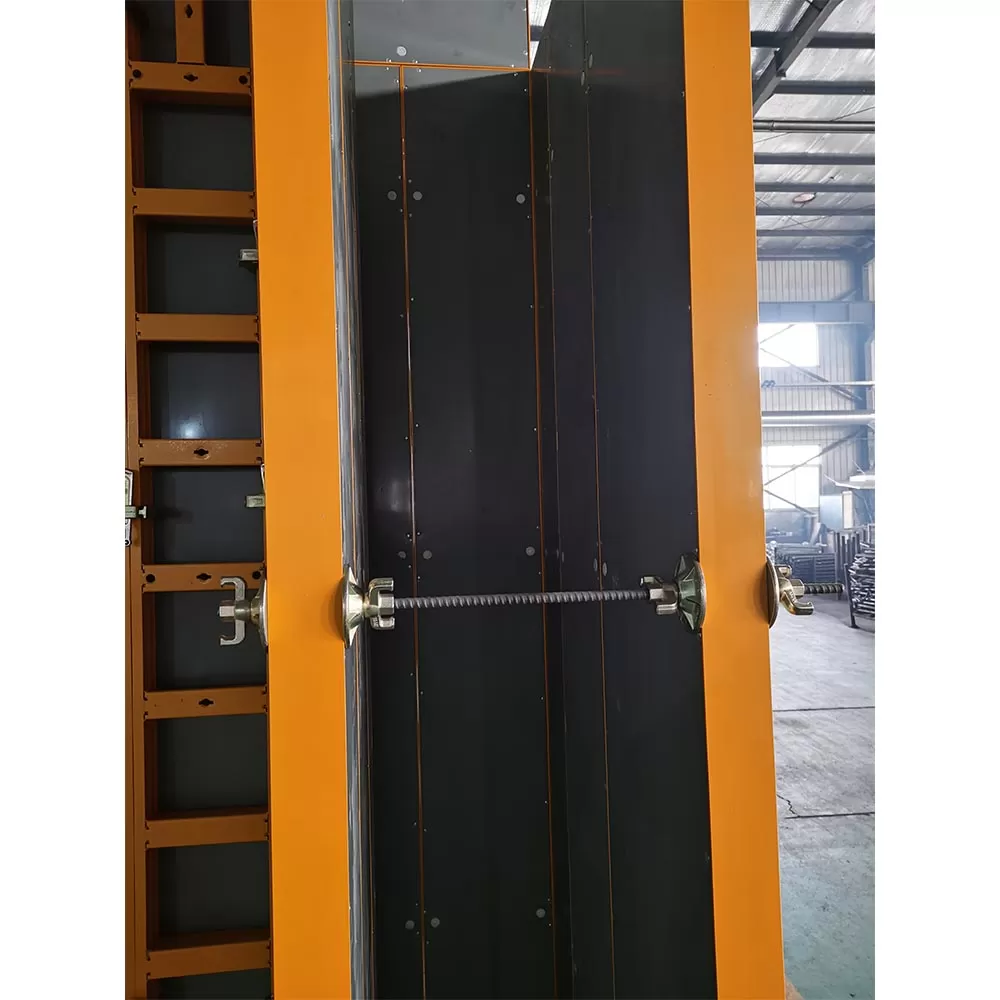
If you work with concrete wall formwork, the Formwork Tie Rod System is one of the most critical load-bearing components on site, but it is also one of the easiest to misuse. Contractors, foremen, and site engineers often face the same problems: tie rods that are overtightened, waler spacing that is inconsistent, damaged threads that are reused, and side pressure from fresh concrete that is underestimated. The result can be panel bulging, leakage, misalignment, and in the worst cases, a formwork blowout. In this guide, we combine practical jobsite advice with recognized standards and engineering data so you can reduce rework, improve dimensional accuracy, and protect workers during every pour. For example, OSHA reports that about 65 percent of construction fatalities are caused by falls, while formwork failures are less frequent but can still cause severe injury when loads are not controlled. This article also explains how DYNAST tie rod accessories, cones, wing nuts, and water stop details can be selected for safer installation. Reference image:
Search terms naturally covered in this article include formwork tie rod system safety tips, how to install tie rods for wall formwork, and prevent formwork blowout during concrete pouring. Related semantic terms include fresh concrete lateral pressure, turnbuckle alignment, and structural load path. Professional terms such as working load limit, shear capacity, and concrete hydrostatic pressure are used where they matter for practical site decisions.
A wall form is only as safe as its weakest connection. In most formwork systems, tie rods resist the lateral pressure generated by fresh concrete until the mix gains enough strength to support itself. That pressure can be substantial. ACI 347.2R, the American Concrete Institute guide for formwork pressure, explains that pressure depends on placement rate, temperature, slump, vibration, and the use of admixtures. In other words, two pours with the same wall height can create very different loads. This is why a one-size-fits-all assumption is unsafe.
On jobs where the tie rod layout is based on habit instead of calculation, the common symptoms appear quickly: panel movement, leaking grout, distorted corners, and anchor points pulling out. Once a wall bulges by even 5 to 10 mm, downstream work such as plastering, waterproofing, or cladding often needs correction. Those corrections cost time and money, and they can delay the next trade. A small alignment issue at the formwork stage can turn into a 1 to 2 day schedule slip after stripping and inspection.
Industry guidance is clear that safe formwork is not just about materials; it is about inspection, design, and controlled installation. OSHA Subpart Q requires formwork and shoring to be designed, erected, supported, braced, and maintained so that they can safely support all vertical and lateral loads. For contractors looking for reliable hardware, DYNAST supplies tie rods and related accessories that are commonly used in wall formwork, column formwork, and retaining wall applications.
What to do: Check the project drawing, tie rod spacing, permitted pour rate, and the expected concrete pressure before any hardware is installed.
Why: Tie rods fail when their capacity does not match the actual lateral load from fresh concrete.
How to do it: Confirm the wall height, concrete mix, temperature, slump, and vibration method with the engineer or site supervisor. Use the formwork design rather than guessing from previous jobs. If the design shows tighter spacing near the bottom of a tall wall, do not widen it to save time. That decision can reduce safety margin by a large amount.
Best for: High walls, rapid pours, pump placements, and projects using self-consolidating concrete, where pressure can stay high for longer than expected.
For reference, ACI 347.2R notes that slower placement and lower temperatures can increase form pressure duration, which means the tie rod system must remain stable for longer. That is why careful design checks are more important than visual judgment alone.
What to do: Inspect every tie rod, wing nut, washer plate, cone, and coupler for damage, rust, bent threads, and missing parts.
Why: A damaged thread or deformed nut can reduce load transfer and cause local failure.
How to do it: Run a nut along the rod by hand to check smooth engagement. Replace rods with stripped, flattened, or cross-threaded sections. Look for visible necking, deep corrosion, and thread galling. If the washer plate is cupped or the cone is cracked, remove it from service. Keep rejected hardware in a separate bin so it cannot be mixed back into usable stock.
Best for: Rental fleets, frequently reused hardware, and sites where equipment is moved between multiple pours.
In practice, inspection time is small compared with the cost of a failure. Spending 20 to 30 minutes on pre-pour hardware checks can prevent hours of leak repair or panel reset after placement begins.
What to do: Set the Formwork Tie Rod System at the spacing shown in the approved formwork plan, and make sure walers are straight and fully seated.
Why: Uneven spacing creates uneven restraint, which can cause the panel to bulge between anchors.
How to do it: Mark tie rod locations before assembly. Use a tape, laser line, or template to keep both faces symmetrical. Check that each rod is centered and that the walers carry load uniformly. If one area has a heavy concentration of access openings, corners, or embedded items, ask whether the spacing needs to be changed by the engineer.
Best for: Long straight walls, structures with repeated bay patterns, and formwork that will be reused many times.
Uniform alignment also makes stripping safer. When the tie rod layout is regular, the crew can remove hardware in a predictable sequence, which lowers the risk of sudden release during dismantling.
What to do: Tighten rods gradually and evenly instead of fully loading one area before the next.
Why: Uneven tightening can twist the form face and create stress concentrations near corners and openings.
How to do it: Start from the center and move outward, or follow the sequence specified by the formwork manufacturer. Use hand tools where torque control is important, and avoid impact tools unless the design allows them. After initial tightening, walk the full perimeter and recheck all points for equal contact. If the system uses special wing nuts or lock nuts, confirm they are seated properly and not bottomed out on damaged threads.
Best for: New crews, complex wall geometry, and projects where forms have been rebuilt from mixed components.
Even a modest tightening error can matter. A rod that is overtightened beyond the intended working load limit can shorten the usable life of the hardware, while an under-tightened rod may allow grout leakage and surface defects.
What to do: Select cones, water stops, sleeves, and plates according to whether the wall is temporary, waterproof, or exposed to weather and chemicals.
Why: The wrong accessory can create leakage paths, concrete fins, or premature corrosion around the tie rod opening.
How to do it: For basement walls or retaining walls, use water stop details where specified to reduce water migration through the tie rod hole. For exposed architectural concrete, make sure the finish face hardware matches the required appearance. For reusable systems, confirm that sleeves and cones are compatible with the rod diameter and thread standard. DYNAST offers accessories commonly used to improve alignment and stripping efficiency in repetitive formwork cycles.
Best for: Water-retaining structures, basement construction, and projects with visible concrete finishes.
Accessory choice affects both performance and labor. The right detail can reduce patching work after stripping, while a poor match can leave visible defects that require repair before handover.
What to do: Keep the pour rate within the design limits and monitor vibration so that the formwork is not overloaded.
Why: Fresh concrete pressure changes with placement speed, temperature, slump, and consolidation practice.
How to do it: Assign one person to watch for movement at corners, walers, and tie rod heads during the pour. If the mix is colder than expected or the pour is delayed, pressure can remain high for longer. If pumping is interrupted and restarted, check the system again before continuing. Do not let the vibrator stay in one area too long, because excessive consolidation can increase fluid pressure near the face.
Best for: Large wall pours, hot-weather work, cold-weather work, and mixes with high slump or admixtures that slow setting.
ACI guidance emphasizes that concrete pressure is not fixed. The site team must treat the tie rod system as a live load-resisting assembly during placement, not as a passive part of the wall.
What to do: During the pour, assign a competent worker to monitor the form face, rods, and joints continuously.
Why: Early movement is easier to correct than a full form failure.
How to do it: The spotter should look for widening joints, bulging between tie points, leaking slurry, or sound changes that suggest shifting pressure. If movement is detected, stop the pour, inform the supervisor, and reassess before resuming. Keep tools, wedges, and backup bracing ready, but use them only under the site engineer's direction.
Best for: Tall pours, walls with large openings, and jobs where the crew has limited visual access to the opposite face.
This simple control is inexpensive and often prevents major damage. One trained watcher can catch a problem in the first few minutes, when correction still takes minutes rather than hours.
What to do: Remove hardware only after the concrete has reached the specified strength, and follow the stripping sequence in the method statement.
Why: Premature stripping can damage the wall surface or create sudden release of stored load.
How to do it: Confirm concrete test results or maturity readings before stripping. Loosen the hardware evenly, and never remove multiple critical restraints at once if the wall is still sensitive. Support the panels so they cannot shift after the final tie rod is released. Keep workers clear of the fall line during removal.
Best for: Vertical walls, reusable panel systems, and sites where the same set of forms is turned around quickly.
Stripping is one of the highest-risk stages because the system changes from load-bearing to partially released in a short time. Good sequencing reduces the chance of impact injuries and face damage.
Several mistakes appear repeatedly across job sites. First, crews often reuse hardware that looks acceptable but has hidden thread wear. Second, they assume every concrete mix produces the same pressure, which is not true. Third, they tighten all tie rods by feel instead of using a consistent method. Fourth, they ignore accessory compatibility and mix parts from different systems. Finally, they skip documentation, which makes it impossible to trace what was installed if a problem occurs.
To avoid these issues, keep a pre-pour checklist, record rod counts and sizes, and store damaged parts separately. A simple log that tracks rod reuse cycles, inspection dates, and replacement status can reduce unplanned downtime and help the procurement team order the correct parts before shortages affect the schedule.
When the project has repeated wall pours, standardization pays off. Sites that use a fixed tie rod kit, consistent labeling, and one approved supplier often spend less time on sorting and less time on corrective work after stripping.
For small contractors, the most practical improvement is inspection discipline. Start with a simple checklist for thread condition, plate flatness, and accessory fit. For larger contractors, the biggest gain usually comes from standardizing the system across projects so crews do not improvise with mixed parts. For engineers and supervisors, the highest-value step is aligning the pour plan with the actual form pressure assumptions and confirming that site changes do not invalidate the design.
If your team handles basement walls, retaining walls, or water-exposed structures, prioritize water stop details and corrosion-resistant storage. If your team works on repetitive commercial floors or high-rise cores, prioritize consistent spacing, fast identification, and repeatable assembly. DYNAST product lines are often used in these scenarios because the accessories can be organized around a standard workflow and inspected more easily before each cycle.
Safe use of a Formwork Tie Rod System depends on three things: correct design, careful inspection, and controlled installation. Check load assumptions before the pour, inspect every component before reuse, keep spacing and alignment consistent, tighten in sequence, monitor the wall during placement, and strip only when the concrete has gained enough strength. These steps reduce leakage, bulging, and costly rework while improving worker safety on site.
In practical terms, the best results come from treating tie rod hardware as a structural system, not as simple accessories. When the hardware matches the pour conditions and the team follows a standard process, the wall is more likely to stay within tolerance, the finish is easier to patch, and the crew can turn the forms around sooner with less risk.
Its main purpose is to resist the lateral pressure of fresh concrete and hold opposite form faces at the correct spacing until the concrete can support itself.
Check thread condition, straightness, corrosion, and any visible deformation. If a rod has stripped threads, necking, or bent sections, remove it from service and replace it.
No. Spacing should be based on the approved design, wall height, pour rate, mix properties, and vibration method. Different wall conditions can create very different pressures.
Common causes include poor design, excessive pour rate, damaged hardware, incorrect assembly, and inadequate monitoring during placement.
No. They are most useful where water tightness matters, such as basements, retaining walls, and water-retaining structures. Use them only where specified by the project design.
DYNAST offers tie rod-related components used in repetitive concrete formwork work, which can simplify compatibility, inspection, and replacement planning on site.
For safer projects, combine engineering checks, site discipline, and reliable hardware selection. That is the most practical way to improve the performance of the Formwork Tie Rod System from the first assembly to the final strip.