News
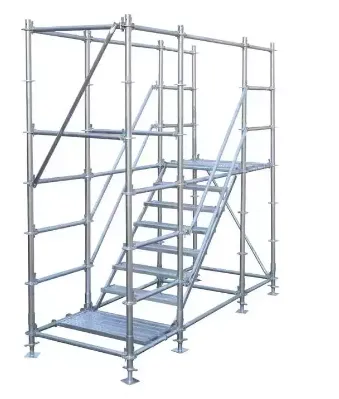
Cuplock Scaffolding is valued because it is fast to assemble, stable under load, and practical for many types of construction and maintenance work. Buyers searching this topic usually want to understand how the system locks together, what tools are needed, how to build it safely, and how to avoid costly mistakes during installation. They also want to compare it with other modular systems such as Ringlock System Scaffolding, especially when choosing a system for a real project. DYNAST helps project teams choose the right scaffolding solution with reliable product quality, clear technical support, and project-ready supply.
Cuplock Scaffolding is a modular scaffold system that uses a unique cup-and-blade locking mechanism to connect horizontal members to vertical standards. Instead of using many loose fittings, the system locks quickly at regular intervals, which helps teams build safer working platforms in less time. Buyers usually search for this topic because they want a clear explanation of how the system works before they decide whether to purchase or rent it for their project.
The purchasing group often includes project managers, procurement teams, site engineers, and contractors. Their main concerns are not just how the scaffold is assembled, but also whether it can reduce labor time, support heavy loads, adapt to different building shapes, and maintain safety on site. They often compare Cuplock with Ringlock System Scaffolding to understand differences in speed, flexibility, and application range. For many buyers, the real question is whether Cuplock will save time and cost without compromising stability.
People searching "How does Cuplock Scaffolding work?" usually want practical answers, not theory. They expect a working process, a component explanation, a list of tools, installation steps, and mistakes to avoid. They also want to know whether the system is suitable for facade work, slab support, access towers, or maintenance projects. In short, the search intent is highly commercial and practical.
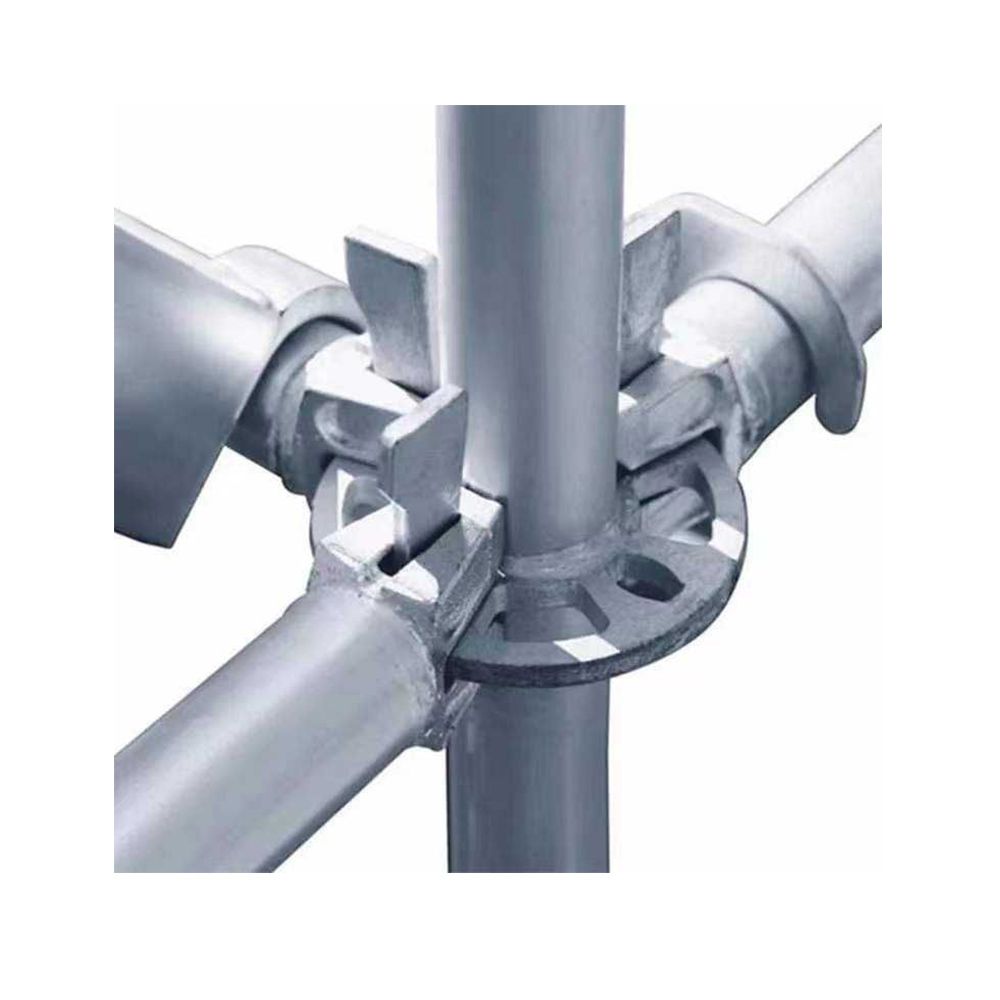
Vertical standards are the main load-bearing members of the system. They are fitted with fixed lower cups and movable upper cups at regular intervals. These cups are the core of the locking mechanism, because they allow horizontal members to be secured without separate couplers in most standard configurations.
Ledgers run horizontally along the length of the scaffold, while transoms support the scaffold boards or create structural spacing. When the blade ends of these members are inserted into the lower cup and locked by the upper cup, the frame becomes rigid and stable. These parts are essential for both access and load support.
Base plates spread the load to the ground, while adjustable jacks help level the scaffold on uneven surfaces. A scaffold is only as safe as its foundation, so these components are necessary for correct alignment and load transfer. Buyers should always confirm the ground condition before deciding the jack length and base arrangement.
Braces improve lateral stability, boards create the working platform, and guardrails protect workers from falls. These accessories do not only improve safety; they also help the scaffold meet project and regulatory requirements. A complete system should include all required safety elements, not just the primary frame parts.
Before any scaffold is assembled, the site must be checked carefully. The team should confirm ground bearing capacity, slope, obstacles, overhead hazards, and access routes. If the ground is soft or uneven, the scaffold needs proper leveling measures before the first standard is installed. This step is critical because a poor foundation creates instability throughout the entire structure.
Place the base plates or jack bases at the marked points according to the scaffold layout. If adjustment is needed, use screw jacks to level the structure. This creates the starting point for the standards and helps distribute the vertical load properly. Accurate positioning here will make the rest of the installation much easier.
Stand the vertical standards on the prepared base points. Each standard should be upright and aligned before horizontal members are added. The spacing should follow the project design and the manufacturer’s recommendation. This step forms the main skeleton of the scaffold, so alignment must be checked repeatedly.
Insert the blade ends of the ledgers and transoms into the lower cup on the standard, then rotate or position the upper cup to lock them in place. This is the core working principle of Cuplock Scaffolding. The cup mechanism holds the components tightly, which reduces the need for loose fittings and helps speed up assembly. The result is a rigid joint that transfers load efficiently.
Once the first level frame is in place, add diagonal bracing as required by the scaffold design. Bracing prevents side movement and improves overall rigidity, especially for taller structures or wind-exposed sites. Without proper bracing, even a correctly assembled cup joint system can become unsafe under lateral load.
Place scaffold boards or metal planks onto the transoms to create a safe working platform. Ensure the boards are secured, evenly supported, and suitable for the expected load. The platform should be wide enough for workers, materials, and movement without creating overcrowding or trip hazards.
Safety components must be installed before the scaffold is put into service. Guardrails reduce fall risk, toe boards prevent tools and materials from slipping off the platform, and access ladders or stair units provide controlled entry. These items are essential for compliance and site safety.
After assembly, a competent person should inspect the scaffold before use. The inspection should check plumb, level, connections, bracing, platform condition, access, and tie-in points if applicable. Only after the scaffold passes inspection should it be handed over for operational use. This final step is essential for safety and compliance.
Cuplock Scaffolding is designed to reduce the number of loose tools needed, but a proper installation still requires essential equipment. Teams should prepare tools before assembly begins so work can proceed efficiently and safely. Missing tools often cause delays and unsafe shortcuts.
Depending on the project size, additional site equipment may be needed to move components, position standards, and support safe work at height. Using the right support equipment improves productivity and reduces manual handling risk.
The biggest attraction for many buyers is speed. Because the cup mechanism locks components quickly, less time is needed for assembly and dismantling. This can reduce labor cost and help keep the project on schedule, especially on jobs with repeated scaffold layouts.
Cuplock is widely used because it can carry substantial loads when correctly designed and erected. The rigid node connection helps distribute force efficiently through the frame. For many contractors, this makes it suitable for both access scaffolding and shoring applications.
The system can be used for building facades, industrial maintenance, bridge work, and slab support. Many purchasing teams compare this versatility with Ringlock System Scaffolding to see which product offers better performance for complex layouts or irregular geometry. Cuplock is often chosen for repeatable, straight-line structures and work that prioritizes speed.
One of the most common mistakes is placing the scaffold on unprepared ground. If the base is soft, sloped, or unstable, the entire scaffold can shift or settle. Proper site preparation is not optional; it is the foundation of safe assembly.
If the upper cup is not fully secured, the ledger or transom may not be properly engaged. This can create hidden instability that is not obvious during a quick visual check. Every connection should be confirmed before the scaffold is used.
Some teams focus too much on speed and forget lateral stability. Without bracing or wall ties where required, the scaffold can sway, deform, or fail under wind and working loads. The scaffold design should always guide these decisions.
Placing too many materials on a platform is a serious risk. Buyers and site teams should know the intended load class and train workers accordingly. Overloading can damage the scaffold and create a collapse hazard.
All parts must be inspected before use. Bent standards, worn cups, cracked boards, or non-compatible components can weaken the system. A strict inspection process helps prevent failures and extends equipment life.
Start by defining the platform height, expected load, access needs, and duration of use. Different projects require different specifications, so the scaffold design must match the actual job conditions rather than a general assumption.
Buyers should evaluate the steel grade, manufacturing accuracy, and surface finish. Hot-dip galvanizing is often preferred for durability and corrosion resistance, especially in outdoor or industrial environments. High-quality components also fit better and lock more reliably.
For purchasing teams, reliable supply matters as much as product performance. A good supplier should provide consistent dimensions, stable lead times, technical documents, and replacement support. DYNAST helps clients source scaffolding solutions that meet project demands and reduce procurement risk.
Some projects benefit from comparing Cuplock with Ringlock System Scaffolding. Ringlock may offer more flexibility for complex geometry, while Cuplock may be preferred for fast repetitive erection. The right choice depends on the project structure, labor strategy, and budget priorities.
Before placing an order, buyers should confirm standards, dimensions, load ratings, finishing, component compatibility, and quality inspection procedures. These questions help avoid buying a system that looks correct but does not meet site requirements.
For larger projects, a supplier should be able to support layout planning or provide reference drawings. This helps the team estimate quantities accurately and avoid ordering too much or too little material.
The lowest price does not always mean the best value. A scaffold system that assembles quickly, lasts longer, and reduces site risk often saves more money in the long run. Procurement teams should evaluate total project impact rather than component cost alone.
In summary, Cuplock Scaffolding works by using a simple but effective cup-lock joint system that connects standards, ledgers, and transoms into a strong modular frame. When installed correctly, it provides speed, stability, and flexibility for many construction applications. For teams comparing it with Ringlock System Scaffolding, the right decision depends on site conditions, project complexity, and procurement goals. DYNAST supports buyers who need dependable scaffolding solutions, and more product information is available at //www.dynastmetal.com/data/watermark/20250612/684a9323b0af6_.webp.